In celebration of above freezing temperatures.
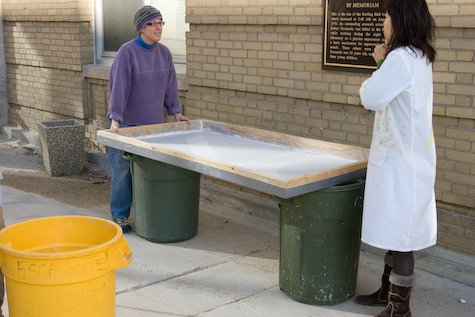
Today we moved outside to form a large sheet of paper.
Continue reading…
Today we moved outside to form a large sheet of paper.

Continue reading…
In no way is this a complete answer, but these ten photographs quickly show you how a sheet of paper is formed and couched. Andrea and Jean work as a team to form sheets of paper from cotton fibers.
These instructions were included in the shipment of Retention aid.
Carriage House Retention Aid is a cationic poly(arnine) specifically manufactured for the retention of pigments, dyes and other fillers in paper pulp.
Directions for using retention aid
Please note that all pigments, dyes, and other chemicals should be handled with care. For more information as to the proper precautions in working with art materials, contact: Cent for Occupational Hazards, 7 Beekman St., New York, NY 10038. The Center has several detailed publications on this important subject.
Use and Instructions:
Retention Aid is used by first making a stock solution. This is then measured out for use and diluted further before adding to the pulp. The dry powder has an indefinite shelf life. The mixed solution is best used within one or two days, but will store longer under most conditions.
Making stock solution:
The stock solution is made by mixing the dry powder with water to make a concentrated solution. To allow the solution to mix properly, it is best to make it the night before it is needed, though in most circumstances a solution free of lumps can be made within an hour. The ratio of the powder to the water is 1 tsp. powder per 1 pt. of water. Slowly add the powder to the water while mixing, until all powder is into solution. If necessary, use a blender to break up the clumps.
Use of stock solution:
The stock solution must first be diluted with 1 gal. of water before it is added directly to the pulp to allow for even dispersion. Add your pigment to the pulp. Once you have the color you want, slowly begin adding the retention aid solution. Continue to add until the pigment is retained.
Use with sizing:
If you are using sizing, the order for mixing is: pigment, retention aid, sizing. Allow about 5 min. between steps for proper mixing.
Carriage House Paper
1 800 669 8781
A resent observation. A student was using pigment to add color to the cotton fiber. She added too much pigment to the pulp. When she squeezed the pulp to, she noticed that alot of the yellow ran out. When this happens, you need to rinse the pulp. Do not add more retention agent as that will not keep the pigment from running out. Adding more retention agent is not going to keep the pigment in the pulp. It is simply over saturated with pgiment. Rinse the pulp with fresh water to flush out the excess pigment prior to forming the sheets. Not rinsing it will stain all the felts. It is best to be safe and wear rubber gloves when flushing out the pigment if you think it is at excess levels.
Using Soda Ash – Use eye protection and rubber gloves.
USE: Cooking raw fiber to prepare for papermaking.
COOKING INSTRUCTIONS: For fibers such as Kozo, use 4 to 5 ounces per pound of dry fiber. Cook in a stainless steel or enameled steel pot NOT IN an aluminum pot, .
PRECAUTIONS: Soda Ash is considered mild, but it a caustic and requires careful handling. All alkali chemicals should be added to water, never add water to an alkali as spattering can occur; wear eye protection. It rarely irritates the skin, but can cause drying and cracking; wear rubber gloves.
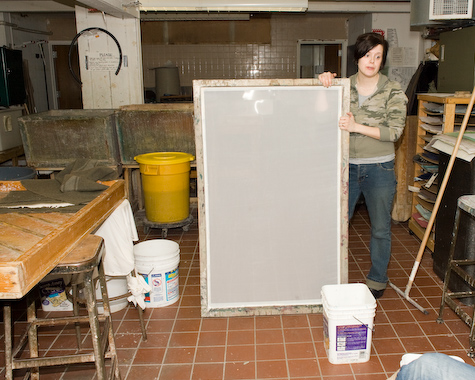
Megan Page is showing the full frame for the sheet of paper. This frame is made out of 2×4 wood with silkscreen material.
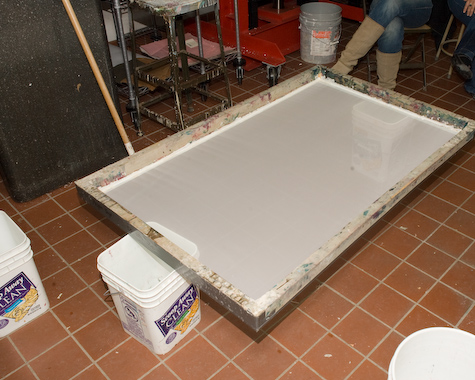
Place the frame off the floor.

Megan is illustrating the slimy nature of formation agent.

This bucket hold several gallons of abaca pulp.

Abaca pulp is added to the 5 gallon pail of formation agent.
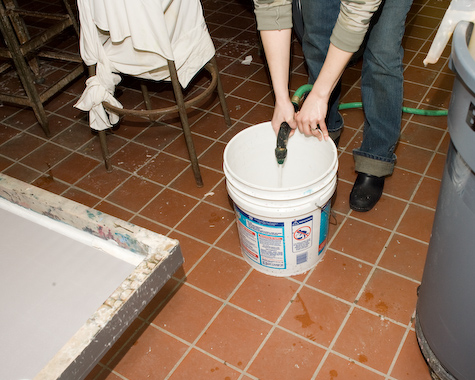
Water is added to fill the pail and mix the pulp.
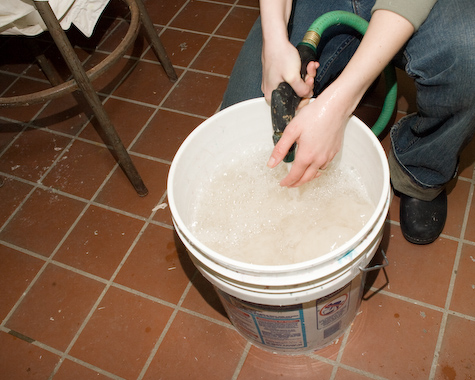
Add water until the pail is full.

A spray hose is used to dampen the screen.
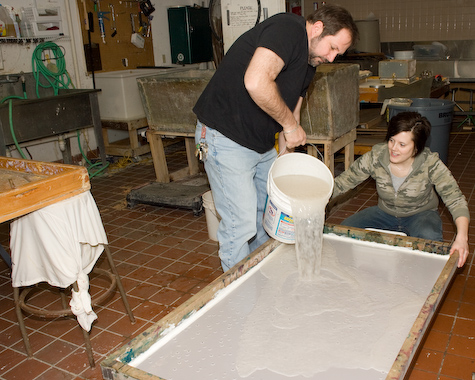
Megan secures the screen while Jim pours the pulp and formation agent onto the screen. Pour the solution as quickly as possible, without spilling it over the edge of the frame.
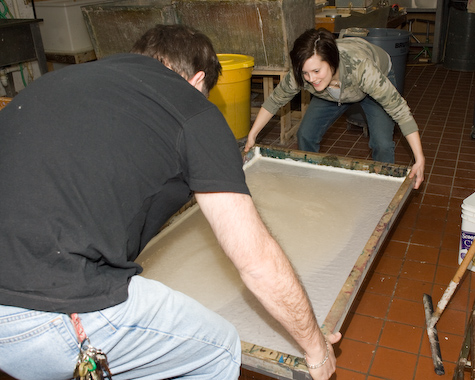
Quickly pick up the frame and rock the pulp slurry from side to side so that the pulp is distributed evenly over the frame.

The rocking may take a few minutes to allow the water to drain from the frame.
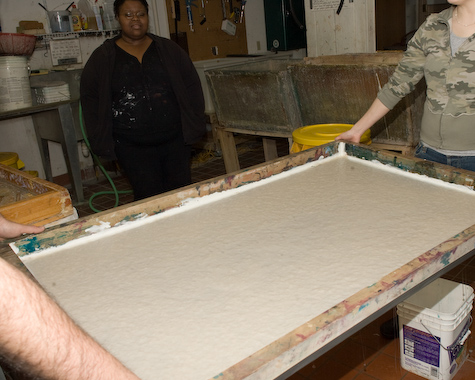
Once all of the water has drained, the wet frame can be set on supports.
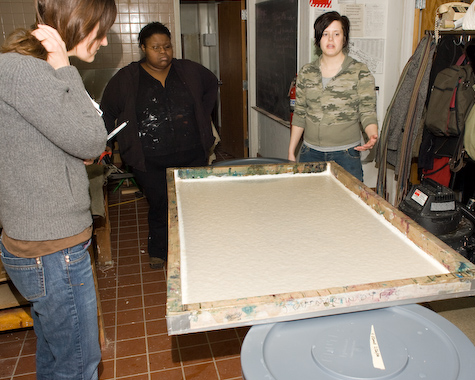
In this case, we placed the wet sheet and frame on two large trash cans.
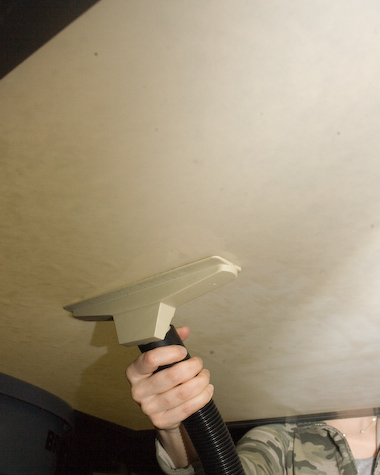
Take the shop vac and begin to suck water from the under side of the frame. The attachment is placed on the silk screen material.

The shop vac attachment must be moved all over the sheet to remove as much water as possible.

Continue moving the attachment all over.

The sheet should be left to dry for a day or two.
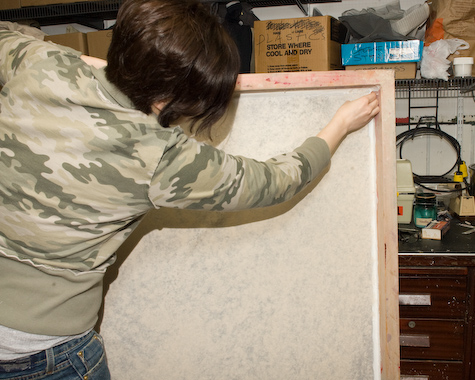
Once the sheet is dry, it must be carefully removed from the screen.

Carefully remove the entire sheet from the screen.
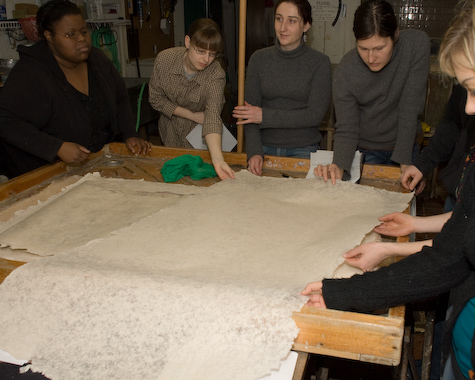
Students inspect a dry sheet
Course description: Investigation and explanation of papermaking by hand as it relates to printmaking, drawing, and sculpture. History of papermaking stressing the last hundred years. Techniques of the craft, traditional sheet forming and use of paper pulp as pure plastic material with same educational goals as metal, ceramics, and wood.
Objective: To introduce fundamental processes of hand papermaking and its disciplined structure.To involve the student in various working process, providing an opportunity for experimentation with the various materials and available equipment used in creative papermaking.
Course structure: Students enrolled in Art 466 are encouraged and expected to work individually and to pursue personal investigation into areas of creative interest which reflect a growth in knowledge and understanding of papermaking and its creative application. You are encouraged to utilize papermaking to expand other areas of your expertise and not limit class activity to sheet forming without a specific project in mind. Specific topics to be discussed will include: Fiber selection, pulp formation, sheet formation, watermarks, pulp coloration, casting and mold making. It goes with out saying that you will not be able to complete all the work for this class during the class time. The mill will be available for use 24 hours. You will be responsible for planning and budgeting your time in order to get all of your work done by the due date. Incompletes will only be given in extreme circumstances. It may be possible to take a field trip or visit the rare book rooms around campus and in order to have a better learning opportunity we may need to plan an activity on a Saturday.
Requirements: Your final grade will be determined from the work displayed in critiques and at the end of the semester. No grades will be given for work not discussed or displayed during the critiques. Dates for critiques and final showing will be discussed during class and will be posted in the papermill. We will have three critiques during the semester. Dates will be posted in the mill on the lab calendar.Class attendance is important if you expect to learn how to work and properly care for the papermill’s equipment. Some of the equipment is dangerous and some can be damaged if not used properly. Therefore students may not use any of the equipment until they have been given proper training. This is for your safety and for the benefit of the equipment. Studio clean-up must be on-going and the responsibility of every member of the class. Please read all posted guidelines before using the mill.
Lab Fee: No course lab fee is required.
Supply list: This is the minimum that you will need.
• We have a supply of rags for you to use. If you want to make a specific color, you may need to look for rags or buy pigment.
• Scissors to cut rags
• Plastic bags in which to store rags
• Rubber boots are optional
• 20 or 32 gallon trash can/s with lid/s
• Blotters
You may want to experiment with some of the following.
• Spray or squirt bottles
• PVC board or masonite for templates
• We will spend a good deal of time talking about the most appropriate materials for your work.
Below is a list if you want to make books out of your sheets
• Book binding thread
• Binding needles
• Paper for books
• Binding board
• X-acto knife and blades
• Straight Edge
• Ruler w/pica & point measurements
• Small triangles for use as cutting edge
• Glue brushes
• PVA adhesive (sobo brand is fine)
• Small towel
• Bone Folder
• Scissors
Requried Book: Asunción, Josep, The Complete Book of Papermaking, New York. Lark Books, 2001.
The papermill lab has a small library of books, samples and instruction manuals. Feel free to read them. However, please do not take them from the mill without writing me a note.
See the attached bibliography for a more extensive list of books and references. This link has many suggested books for this course.
Art supply stores in Madison:
University Bookstore, 711 State Street (Library Mall),
Artist & Craftsman Supply, 449 State Street Suite D,
Masco Art Supply, 604 University Ave
Also consider The Bead Bin, 414 Westgate Mall Madison, and Jade Mountain Bead & Jewelry Co., 823 E Johnson St. These two are a good source for thread and other materials. If you plan your work, you can mail order supplies from a long list of out of state vendors. I have links listed on the Art 466 class page here.
Assignments: Suggested assignments will be posted soon.The first 4 weeks of the course will be devoted to learning how to make pulp and form sheets. Once we have mastered the basics you will be asked to work on projects of your own design. Please see me if you have questions. Everyone is expected to keep extensive notes on the paper that they make. One requirement is for you to leave samples and receipes of the paper that you make. Check with me to see the samples that other students have left in the mill.
Grading:
• Attendance is essential in order to learn how to construct your projects and understand the nature and scope of the class. Attendance is required on demonstration days and critique days. If you need time during class to research your individual projects you should let me know before a class when you will not be in class.
• Participation is essential. Be prepared to ask questions. Make suggestions in the demonstrations and during presentations. Bring samples of work that is relevant to the course and discuss the work of other artists working in papermaking and book arts.
Special Needs: Please let me know during the first two weeks of class if you require special accommodations to participate. I wish to fully include everyone in this class. Any personal concerns are strictly confidential. You may also contact the McBurney Disability Center at 263-2741 or by e-mail. This facility is located in 1305 Linden Drive Madison, WI 53706, 608-263-2741 (phone) 263-6393 (tty) 265-2998 (fax). They have a website which can be viewed at http://www.mcburney.wisc.edu/ Continue reading…
Copyright © 2004–2009. All rights reserved.
RSS Feed. This blog is proudly powered by Wordpress and uses Modern Clix, a theme by Rodrigo Galindez.