Summer Session starts on June 15!
The first day we will meet in 6451 Humanities to review the course. The remainder of the four weeks we will meet in Room 1009 of the Art Lofts, the location of the new paper lab. See you soon.
The first day we will meet in 6451 Humanities to review the course. The remainder of the four weeks we will meet in Room 1009 of the Art Lofts, the location of the new paper lab. See you soon.
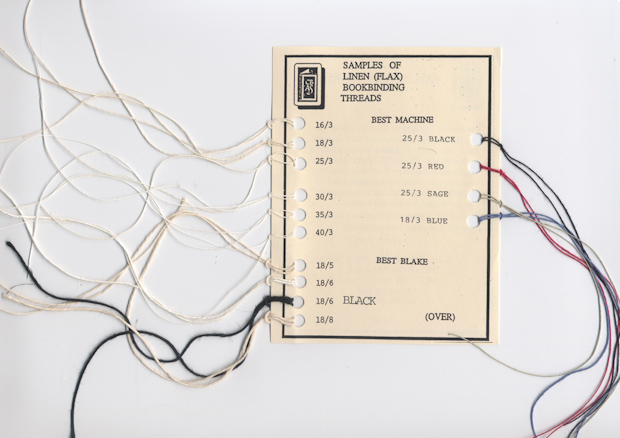
One of the most common questions that I get is “What type of thread is best for binding my book?”
The two suppliers that I use most often for binding thread are Colophon Book Arts Supply and Talas. However, many many vendors sell thread for bookbinding. I have used silk button thread for a small book, since it was the only thread that I could find in the color that I wanted. The photo above shows types of thread most commonly used to sew books. The photo illustrates that binding thread is sold in different sizes. The second number 3, 5 and so on, indicates the number of strands that are wound together to form the thread. The first number indicates the thickness. Therefore thread that is labeled 25/3 is thinner than 18/3. Most often I use 16/3 or 18/3. But every project varies and I seldom ever say one size fits all. It is best to have a variety of size and colors on hand. I am not real sure how vendors determine the first number. My best guestimation is that it relates to the length of thread need to equal a set amount of weight. I am not sure where along the way I heard this. Perhaps you can let me know the best answer.
It is easy, just watch this very short animation. Set the type upside down or “wrong reading” Click here if you have trouble getting the video to play.
This is a test to distribute a handout for binding a simple pamphlet stitch book.
Pamphlet Binding Stitch
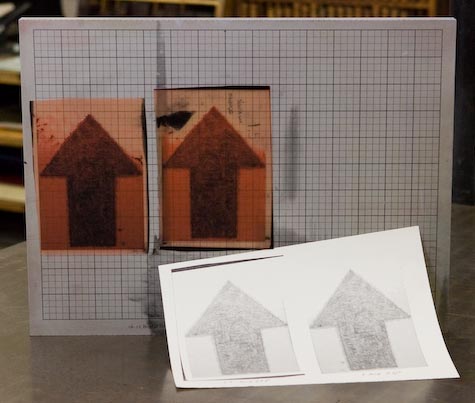
 Dennis Michael Peterson drew a large arrow on frosted mylar. As an experiment, we thought it would be fun to take a digital photo of the drawing and scale it down to print it on our letterpress printing press. His original graphite drawing is about 2 x 3 feet. In Adobe Photoshop we converted the image to a greyscale, set the image size to 8.5 x 11 inches and set the resolution to 300 ppi. The kind folks at Smartset in Minneapolis, MN made the negative for us and quickly mailed it to us. These plates are actually smaller samples that we had made for printing on a post card. Once the larger version is done, we will add more images to this post.
Continue reading…
Information and photos from Sandra Anible’s paste paper demo will be posted soon. Write me if you did not pick up one of her handouts.
Click on this link if you need a pdf file of the first handout. We will spend more time in class on different aspects of the assignment.
Copyright © 2004–2009. All rights reserved.
RSS Feed. This blog is proudly powered by Wordpress and uses Modern Clix, a theme by Rodrigo Galindez.