How to Make a Leather Journal
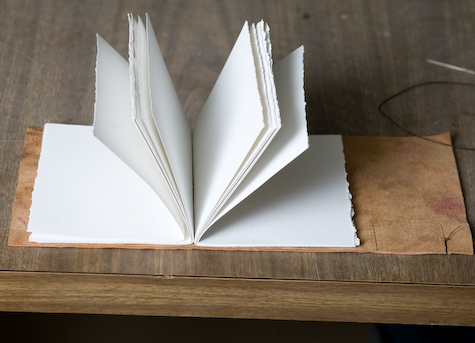
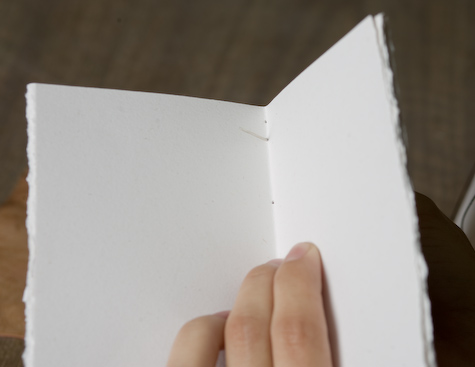
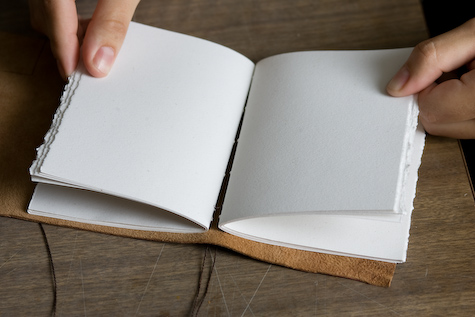
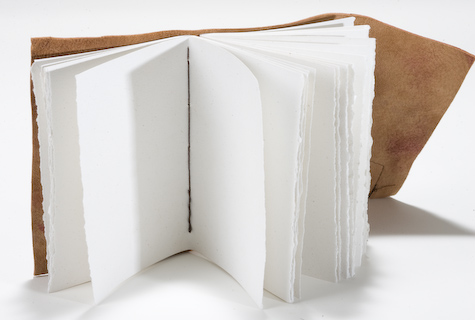
Danika Morphew-Tarbuck gave a demo to the class to teach us how to sew a leather wrapper around two signatures of drawing paper. Below is a photo of a sample that she created.
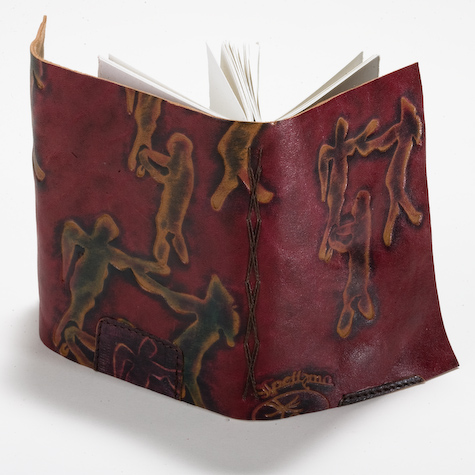
Danika used leather from a purse that she bought at a thrift store to use as the cover. Heavy weight drawing paper was used for the journal pages. She said sewing is easier if you use waxed linen thread. You will need two needles to sew this book.
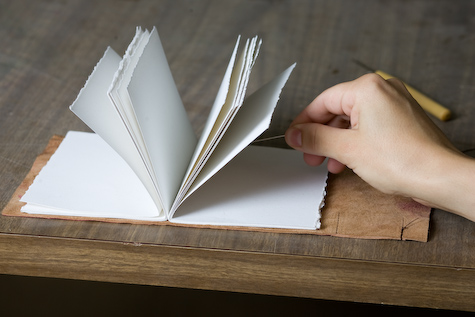
Step by step photos can be seen by going to the Read more >.

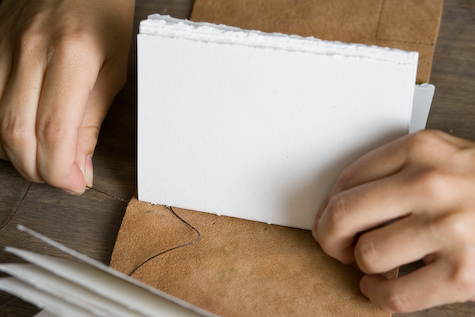
Place the leather cover / wrapper on a flat work surface. Next place two signatures of folded drawing paper as illustrated above.
Thread needles onto both ends of a long length of thread.
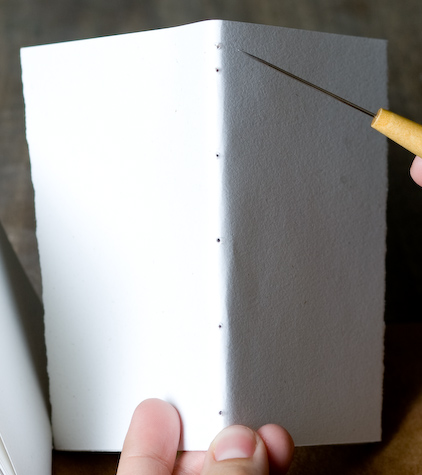
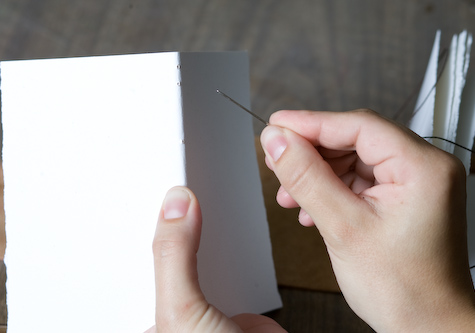
Both signatures should have holes punched in this pattern. At the top of the fold you need two holes about a half inch apart. For this spine pattern, you need to make 6 holes on the spine of each signature. You will start sewing inside the SECOND hole of the second signature.
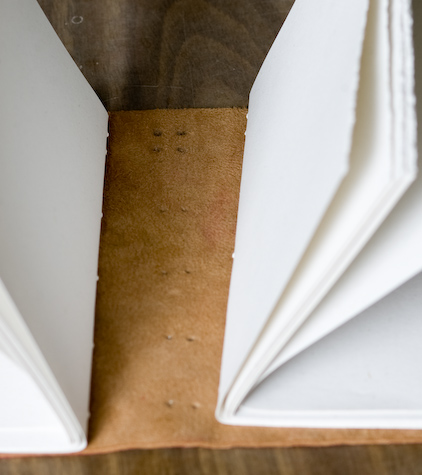
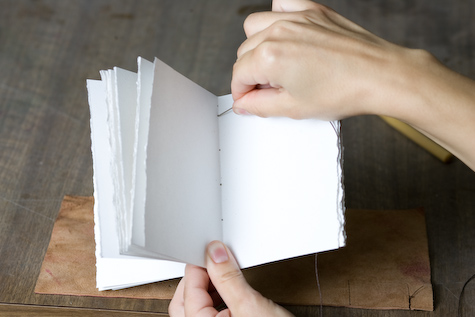
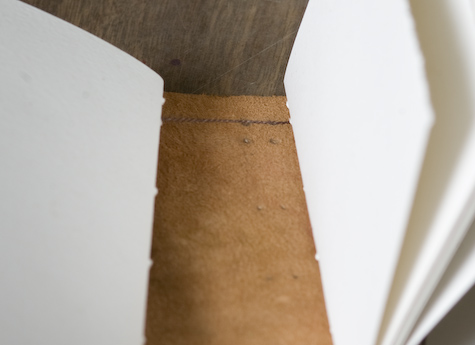
Lay both signatures on the leather cover. Notice that holes have been already been punched into the leather cover. Remember that this layout allows has a longer piece of leather on the right side. This extra portion is going to be used as a wrapper to close the journal once it is finished.
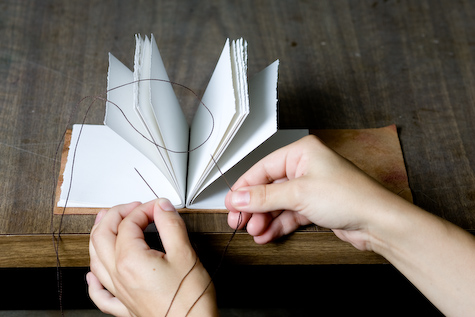
Move them closer together in order to grab both signatures and to start sewing.
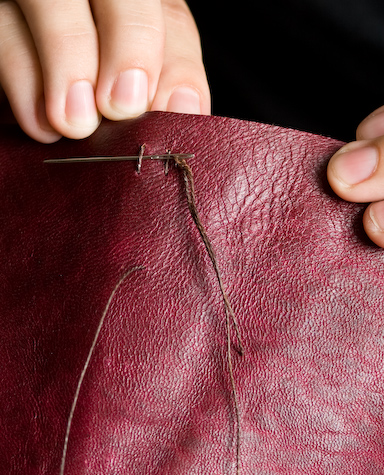
If you are right handed, start on the signature that is on the right. It can be done from the left if you are left handed. Remember (this is very important) that you will start the sewing at the second hole from the top.
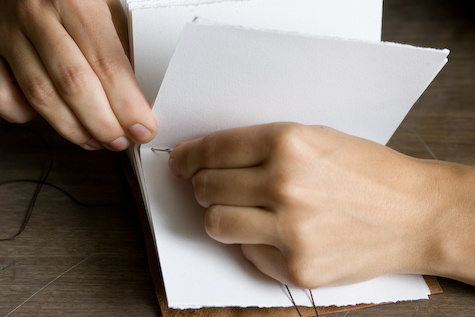
In this photo she is grabbing both signatures. However the next step only requires that you thread one needle through the second to the top hole. It is very important to start from inside the fold at the second hole. The needle and thread only pass through the paper at this point. Do not thread the needle through the leather at this stage.
Once the first needle has been threaded through the right side signature, move the needle over the the second hole from the top of the left side signature. Thread it from the spine side.
Here you can see the front of the needle passing through the second hole of the left side signature.
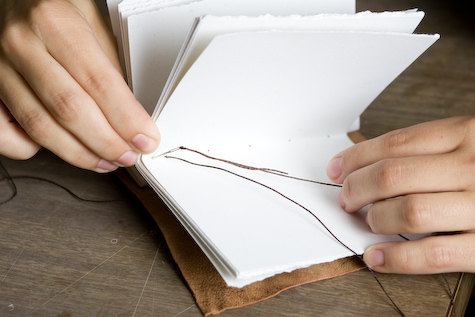
Just a reminder that the thread is been passed through the second hole of the left and right side signatures but not through the leather. Pull the needle and thread so that the length of the middle of the thread’s length is split evenly between the two signatures.

This is an inside view of the left side signature.
You now have one thread through both signatures. Each signature has one needle. At this stage, you want to find the needle that is in the right signature and thread the needle into the top hole as illustrated above.
Pull the thread so that it is tight. Remember to keep the length of the thread even on both sides. You need length of thread to sew both signatures.
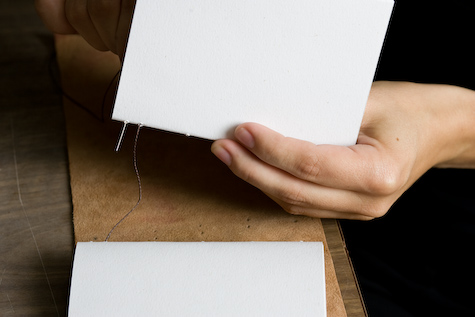
Once the thread is pulled tight on the right side signature, you will pass the needle and thread through the top hole of the leather wrapper.
On the left side signature, repeat the step by moving the thread and needle through the top hole.
This photo illustrates the sequence for the thread and needle on the left side signature.
The portion of the image with the needle is a bit out of focus, but it illustrates how the needle and thread are passed through the leather wrapper from each signature. At this point the two signatures are now being sewn to the wrapper with the single length of waxed linen thread.
The thread is pulled tight and the two signatures are aligned on the top of the wrapper.
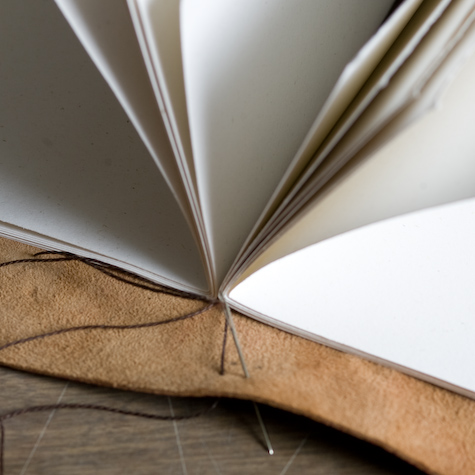
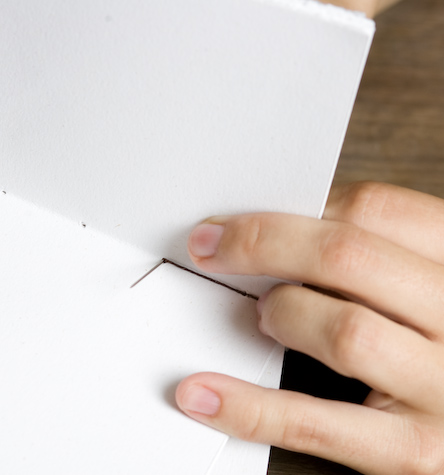
This image illustrated the view from the spine. Notice that the thread passed through the inside of the fold out through the spine at the top hole.
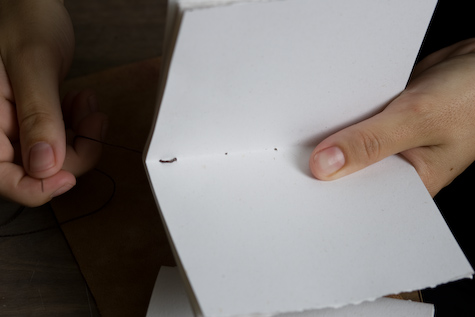
Next the needles and thread are sewn back into the signatures at the second hole.
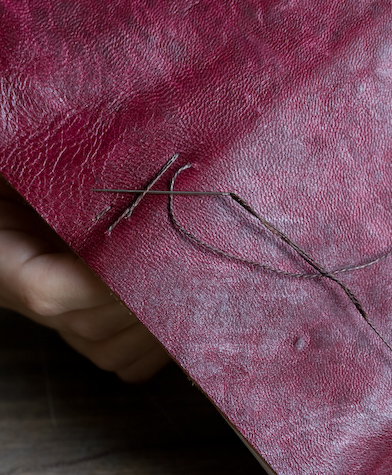
This is the point of the binding where the chris-cross decorative stitch begins. Start with the thread from the inside of either signature and thread the needle from the inside out at the next hole (3rd hole).
Once the thread is pulled tight, the needle is moved to the top left stitch to form a diagonal line.
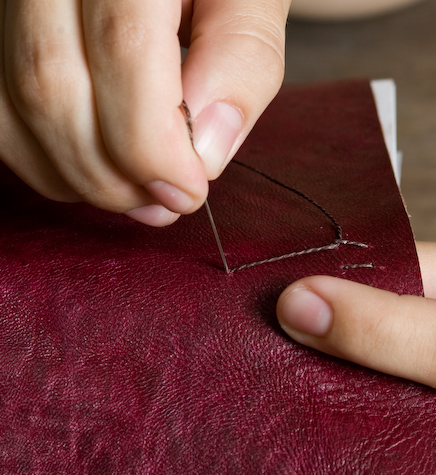
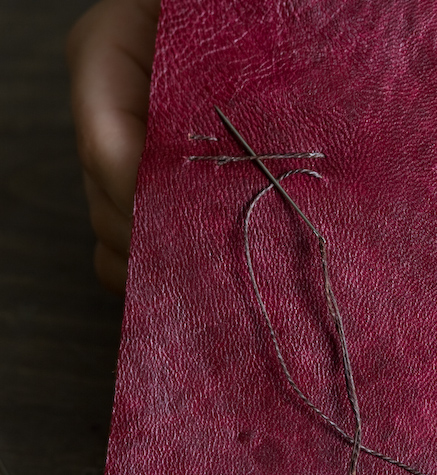
The same needle and thread are returned to the same hole and inserted back into the the hole that it came from.
The needle and thread are brought back into the same hole and the same signature. Then they are left alone while you move over to the other signature with the other needle.
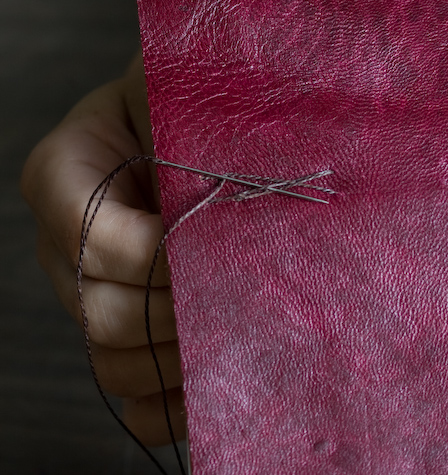
Next, grab the needle in the left signature and thread the needle out of the thrid hole from the inside.
Once the needle has been pulled tight, slide it under the diagonal stitch as illustrated.
The needle should pass under the thread and then should hook in at the top stitch of the opposite signature to create a diagonal line with the thread. The first upward stitch should go under the diagonal stitch and then on the down one it can stay above the stitch. You are simply trying to make a cross over design or pattern. Once you complete this side, you should have completed one section of both signatures. You simply continue this pattern, by sewing one section at a time for each signature until you reach the bottom of the book. To tie off, simply tie a knot on the inside of the last sewing hole.
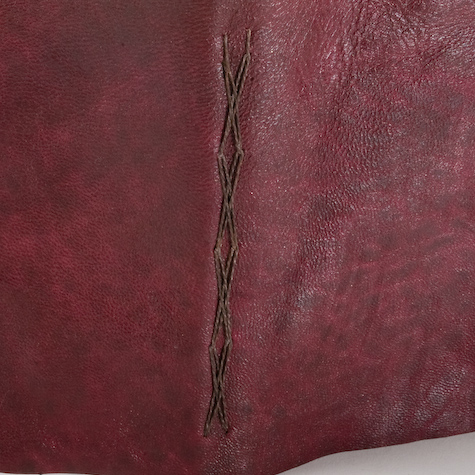
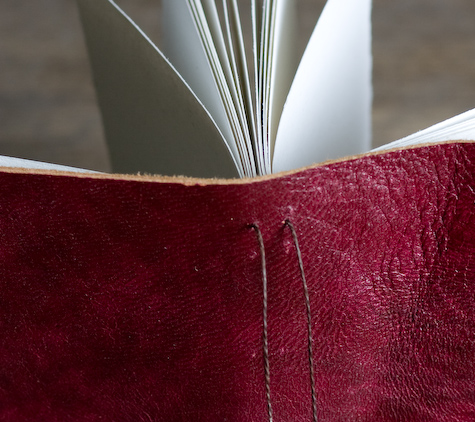
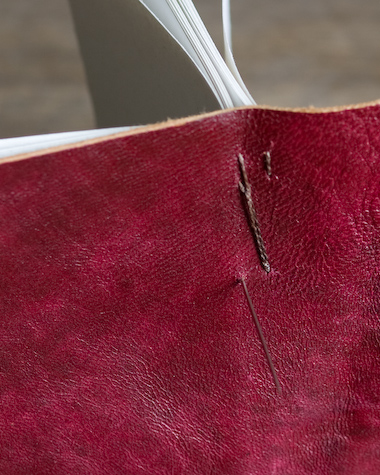
A closer view of the stitched pattern on the spine of the finished book.

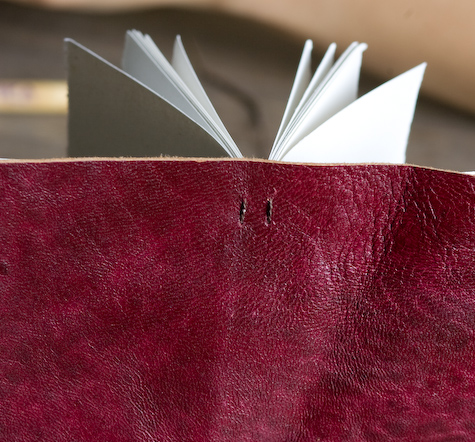
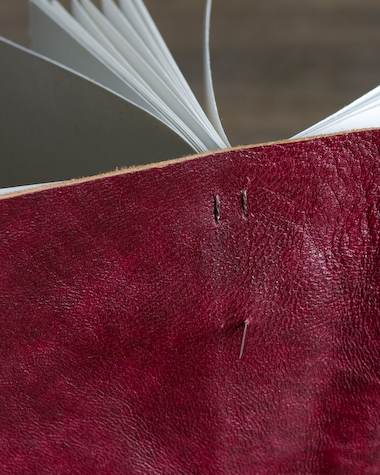
View of the full wrapper.
This inside view shows the thread as it is tied off at the bottom of the signature. You will need to tie down the thread inside of both signatures.
Very interesting. I am new to book making and can’t wait to try this out! Very good step by step instructions. Thanks!