Latest Entries

Dragon Scale binding video

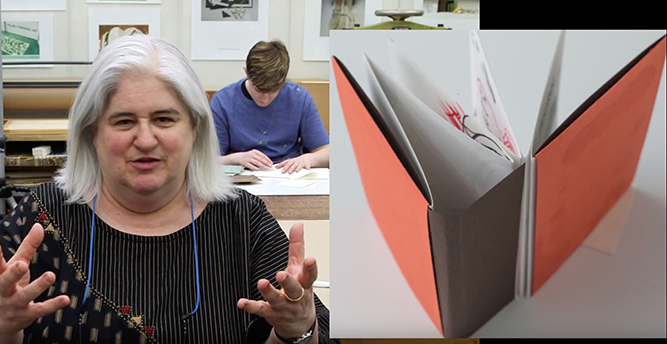
Cynthia Tidler, a University of Wisconsin-Madison, Master of Fine Arts graduate from 2015, was a student in my book arts class. Cindy had written a creation story for her Folklore class and wanted to create a unique book. As she searched for an appropriate book structure, she learned about the Dragon Scale binding. This style of binding was popular in China around 650 A.D. While she was not able to find many examples to use for  reference, the book structure was very appealing to her. The structure allows the viewer to turn the pages  and then the book can be rolled into a scroll. Her book combined a panoramic drawing with the text that she wrote. 
To make the book, Cindy printed the text pages and then folded all of the  sheets into folios. She then printed a complete reproduction of her drawing using a large format inkjet printer. Finally, she cut the reproduction into narrow strips and glued each strip to the far edge of each folio. Follow how she made this book in the video that I posted on YouTube.com.
Using dry mount tissue in book binding

I made three videos on using dry mount tissue for book binding. I began using dry mount tissue for mounting photographs way back in 1975. It was a common practice for mounting photos to mount board for exhibiting photographs. Years later I learned that many binders were using dry mount tissue along with tacking irons or dry mount press to connect book pages together. I did not find too many references to it on line. These three videos might be helpful if you want to try using dry mount tissue in a book binding project. I am interested in hearing from others that use this method.

Two-Signature Pamphlet demo


This video tutorial demonstrates a nice way to sew two signatures into a cover wrapper. This saves some time as you can quickly sew a printed cover on a two signature book, using the simple three-hole pamphlet stitch.

Artists’ Books on Display


On display at the Kohler Art Library are a few of the books that Barbara Mackey Kaerwer donated to the library. The donation contains over 1000 books. This exhibit showcases examples of fine books on German and Austrian art published between 1898 and 1950. For more information about the Kohler Art Library on the University of Wisconsin-Madison, visit the Kohler Art Library link. Current MFA candidate Carissa Heinrichs skillfully narrated the video.

Pop up Book Display


Out Popped Summer was an exhibition at the Kohler Art Library on the University of Wisconsin-Madison campus. The Kohler Art Library has an impressive Artists’ Book Collection with a searchable data base of the objects that are part of the collections. If you have not seen the collection, it is well worth your time to visit the library. Prior to you visit, you might want to research some of the books by using their Artists’Book Collection Database.
Two current MFA students from the Art Department, Carissa Heinrichs and Sarah Stankey provided assistance to Lyn Korenic, Director of the Kohler Art Library with the selection and installation. While the exhibition is over, do watch the video and take advantage of the exhibitions that take place in the entrance of the library.

Diane Fine Workshop Video

This spring, artist Diane Fine gave a two and half hour workshop in my book arts class at UW-Madison. In the workshop students shared in an “exquisite corps” inspired playful drawing exercise. Once the drawings were completed they exchanged their drawings and created an accordion bound book. Diane Fine’s workshop video can be seen from the link.
Diane Fine’s 2017 workshop and lecture were made possible by the Leonora G. Berstein Artists’ Book Endowment, at the Kohler Art Library. Many of you are familiar with her books and prints. She publishes books under the name Moonkosh Press. Diane is a 1988 MFA graduate of the Printmaking area at UW-Madiosn. She is also a SUNY Distinguished Teaching Professor at the State University of New York- Plattsburgh.

Clamshell box aid

 (Jim Escalante, Photographer/Photography by Jim Escalante)
This sample might help you as you cut your turn ins for the open tray section of the clamshell box. The shaded or crosshatched areas can be cut and removed. Pay careful attention to the mitered cuts and to the thickness of the board.
 (Jim Escalante/Photography by Jim Escalante)
This cutting pattern can be used for the turn in of the single wall that is opposite to the tray’s open side. Pay careful attention to the mitered cut that is equal in length to the thickness of one board.
You have many options on your preference to cut the miters for your tray covering. These are slightly different to the methods that I show in my video “How to Make a Clamshell Portfolio.”


Copyright © 2004–2009. All rights reserved.

RSS Feed. This blog is proudly powered by Wordpress and uses Modern Clix, a theme by Rodrigo Galindez.